
Basic Blocks
DISCLOSURE: this post may contain affiliate links, meaning I get a commission if you decide to make a purchase through my links, at no cost to you. As an Amazon associate I earn from qualifying purchases. Please read my terms of use policy for more information.
There are quite a few acronyms and funny words thrown around the quilting community. Today I’m sharing names and acronyms for some of the basic blocks that will be used many patterns so you’re prepared to tackle any project you want!
Half Square Triangle (HTS)
Snowball
Flying Geese
I learned pretty quickly when I began quilting that there are different ways to make different blocks, sometimes to cut down on time and sometimes to save on fabric. I won’t talk about all those methods here but will give an overview of a few simple blocks. If you want to experiment with some of these, I recommend the Quilt Block Cookbook by Amy Gibson. She walks through how to make the individual pieces and assemble them into several different style blocks.
Half Square Triangle (HST)
The half square triangle is exactly what it sounds like… two right triangles put together into a square. The most basic way to make this block is by cutting out two squares and placing them on top of each other right sides together (RST). Then draw a line directly down the middle from one corner to the opposing corner.
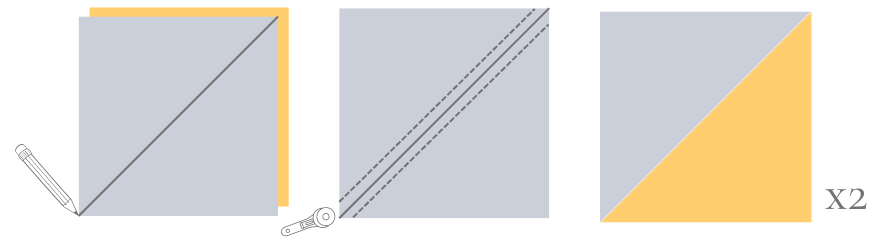
You’ll sew two seems, 1/4 inch off the line. If you don’t have a 1/4 inch foot for your machine, try this one (check how the feet attach to your machine before purchasing). Once you have sewn your two lines, cut down the middle on the line you drew. Press your seems toward the darker fabric. You will end up with 2 HST.
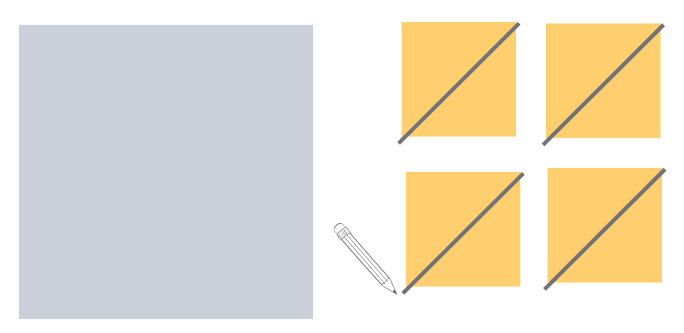
Snowball
This block is often used to represent a circular shape or “rounded” corners in quilting. It consists of one large square and four smaller squares. For example, you might use one 4” square and 4 1.5” squares. Place your large square right side up. Then take your four small squares and draw a diagonal line on the wrong side of each, corner to corner.
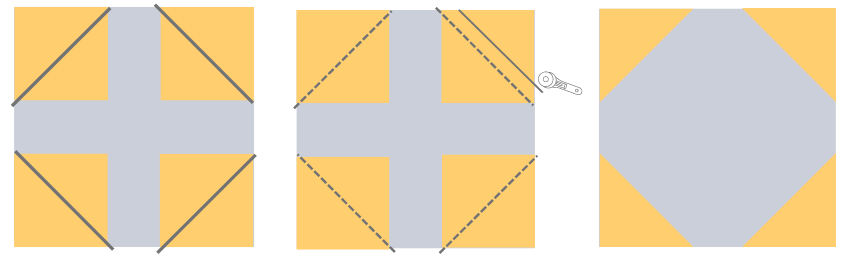
You will now place those squares right sides down in each corner of the large square, as shown below. Sew on the line this time. Then trim off the extra corner 1/4 inch from the seem and press each small square out.
Flying Geese
This is another common building block for a lot of quilts. With this block, you’ll start with a rectangle and two squares. For this example we will use a rectangle 2.5 inches tall by 4.5 inches wide. The math here is to double the height and subtract half an inch to get the width. We will also use two 2.5 inch squares (same as the height of the rectangle). You’ll start by marking your squares with a diagonal line, corner to corner. We’ll place the first one RST on top of the rectangle and sew on the line.
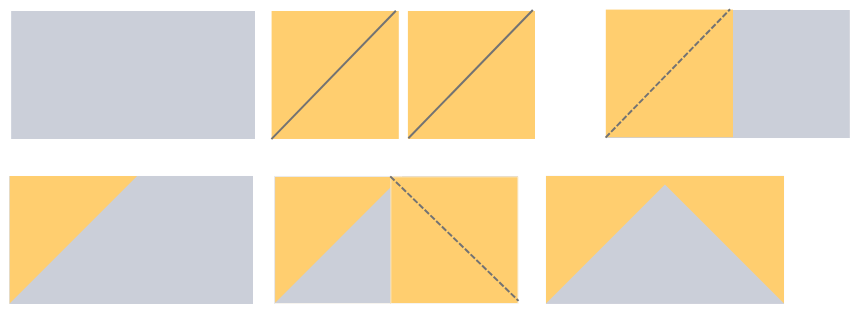
We will then press the square open so we have a triangle in one corner before placing and sewing the second square. Once you press open the second square, you can either leave or trim off the excess fabric from the back.
These are 3 of the most common types of building blocks that I have seen in the beginner and intermediate level quilt patterns I’ve done. There are numerous other methods, such as paper piecing or appliqué that can allow for more shapes, but that’s a conversation for another time! Hope you have fun trying these blocks.
Happy quilting!
Get Your Free Quilt Pattern!
Subscribe to the newsletter to get your free offer.