
3 Things to Know About Using a Quilting Ruler Properly
DISCLOSURE: this post may contain affiliate links, meaning I get a commission if you decide to make a purchase through my links, at no cost to you. As an Amazon associate I earn from qualifying purchases. Please read my terms of use policy for more information.
So you’ve got your ruler, cutting mat, rotary cutter, pattern, and fabric ready to go… now what?
The best place to start is by learning how to properly use your ruler for the most accurate cut and protect yourself from harm in the process. Here’s what we’re covering in this post:
How to align your ruler for the best cut
Safety tips to practice to avoid cutting yourself.
Why are there so many shapes and sizes and does it matter which one I use?
How to align your ruler for the best cut.
I don’t know about you, but when I first got my hands on a quilting ruler, rotary cutter, and cutting mat, my first instinct was to use the gridlines on the mat to line up my ruler. When I found out that the lines on the ruler are the ones to pay attention to, my mind was BLOWN!
The first step is to iron your fabric (see 7 Essential Tools and Supplies Every Quilter Should Own for my recommendation on an iron and starch spray). Depending on the pattern and how much fabric you have, you may want to keep it folded in half to press.
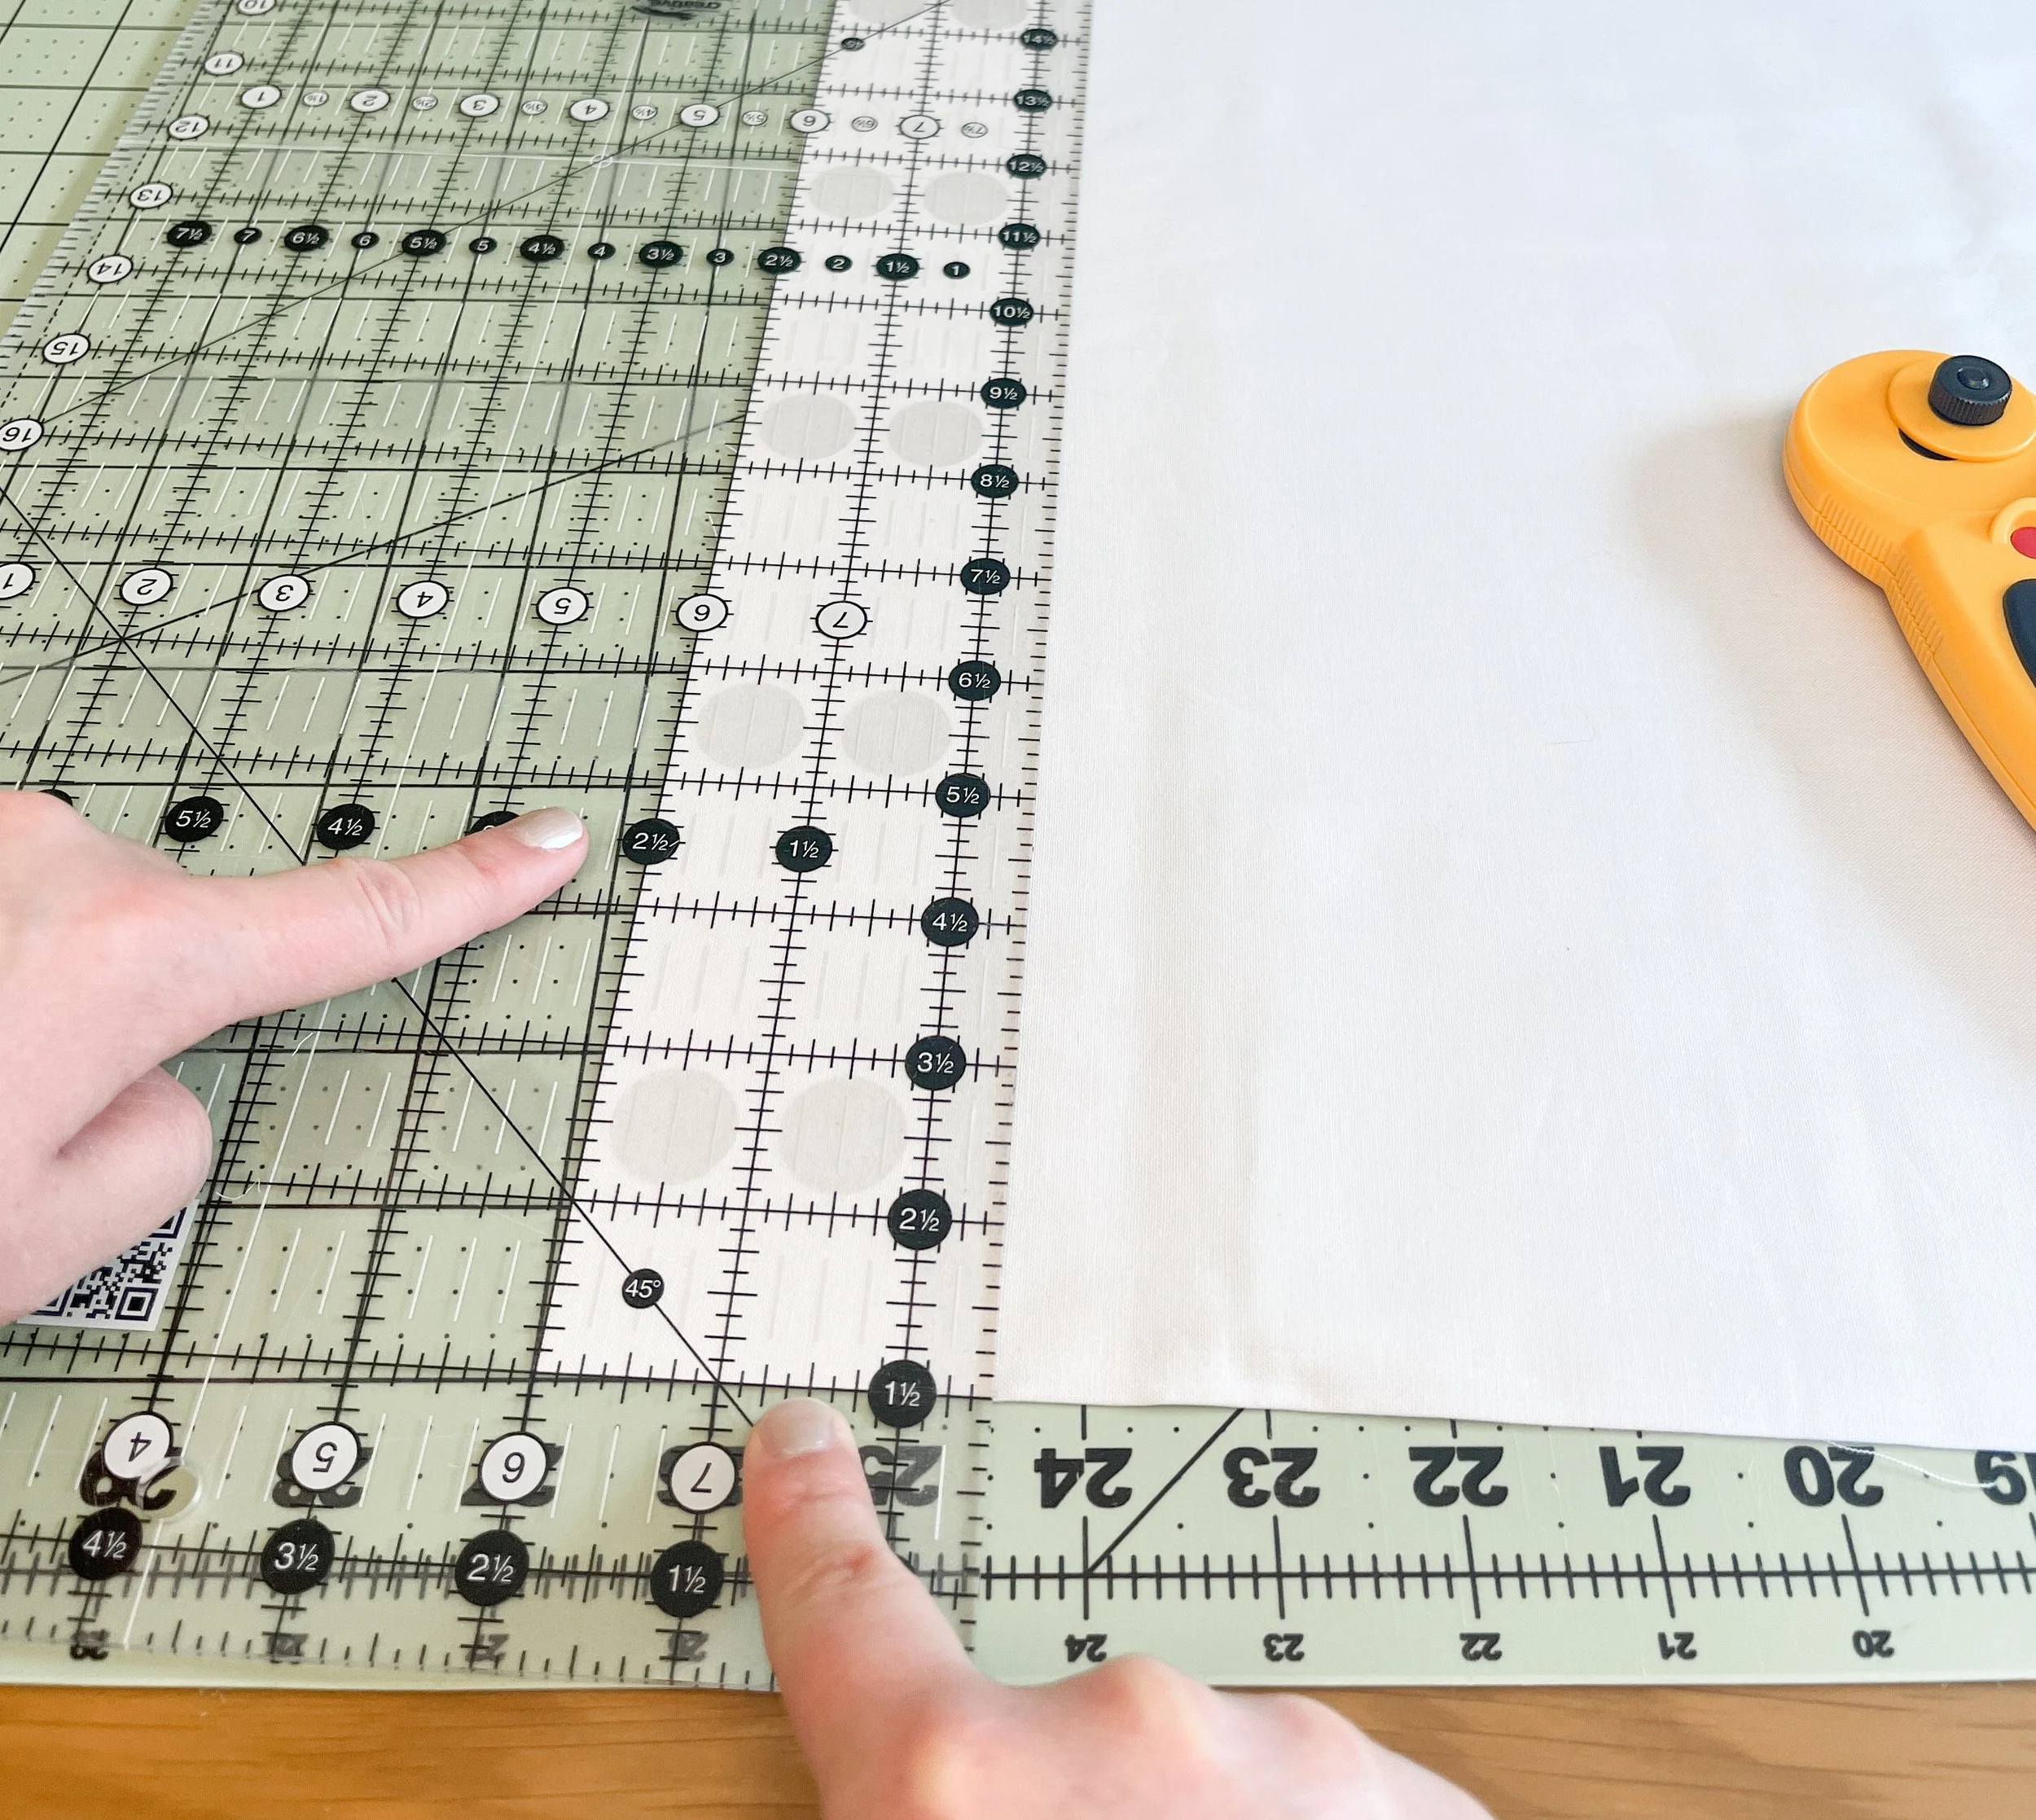
Once your fabric is wrinkle-free, lay it on the mat with the fold closest to you and the edge you want to cut on your dominant side (extra fabric off to the other side). I’m a lefty, but I’m going to assume you’re a righty for this example.
You’ll want to place your ruler on top of the fabric with just a little hanging out the right side. Adjust the ruler so that one of the lines near the bottom is lined up with the crease. You can now make your first cut. This will be the straight edge that you use to line up your future cuts.
You will now either carefully flip your fabric over, keeping the straight edge together OR rotate your cutting mat and ruler or move to the other side of your cutting mat. If you’re trying to cut a 2.5 inch strip, you will line up your straight edge you just cut with the 2.5 line on the ruler. Secure your ruler and make the cut.
You will now either carefully flip your fabric over, keeping the straight edge together OR rotate your cutting mat and ruler or move to the other side of your cutting mat. If you’re trying to cut a 2.5 inch strip, you will line up your straight edge you just cut with the 2.5 line on the ruler. Secure your ruler and make the cut.
Safety tips to practice to avoid cutting yourself.
I know a few too many people who have seriously injured their hands while cutting fabric – OUCH! There’s a couple things you can do to reduce your chances of an accident.
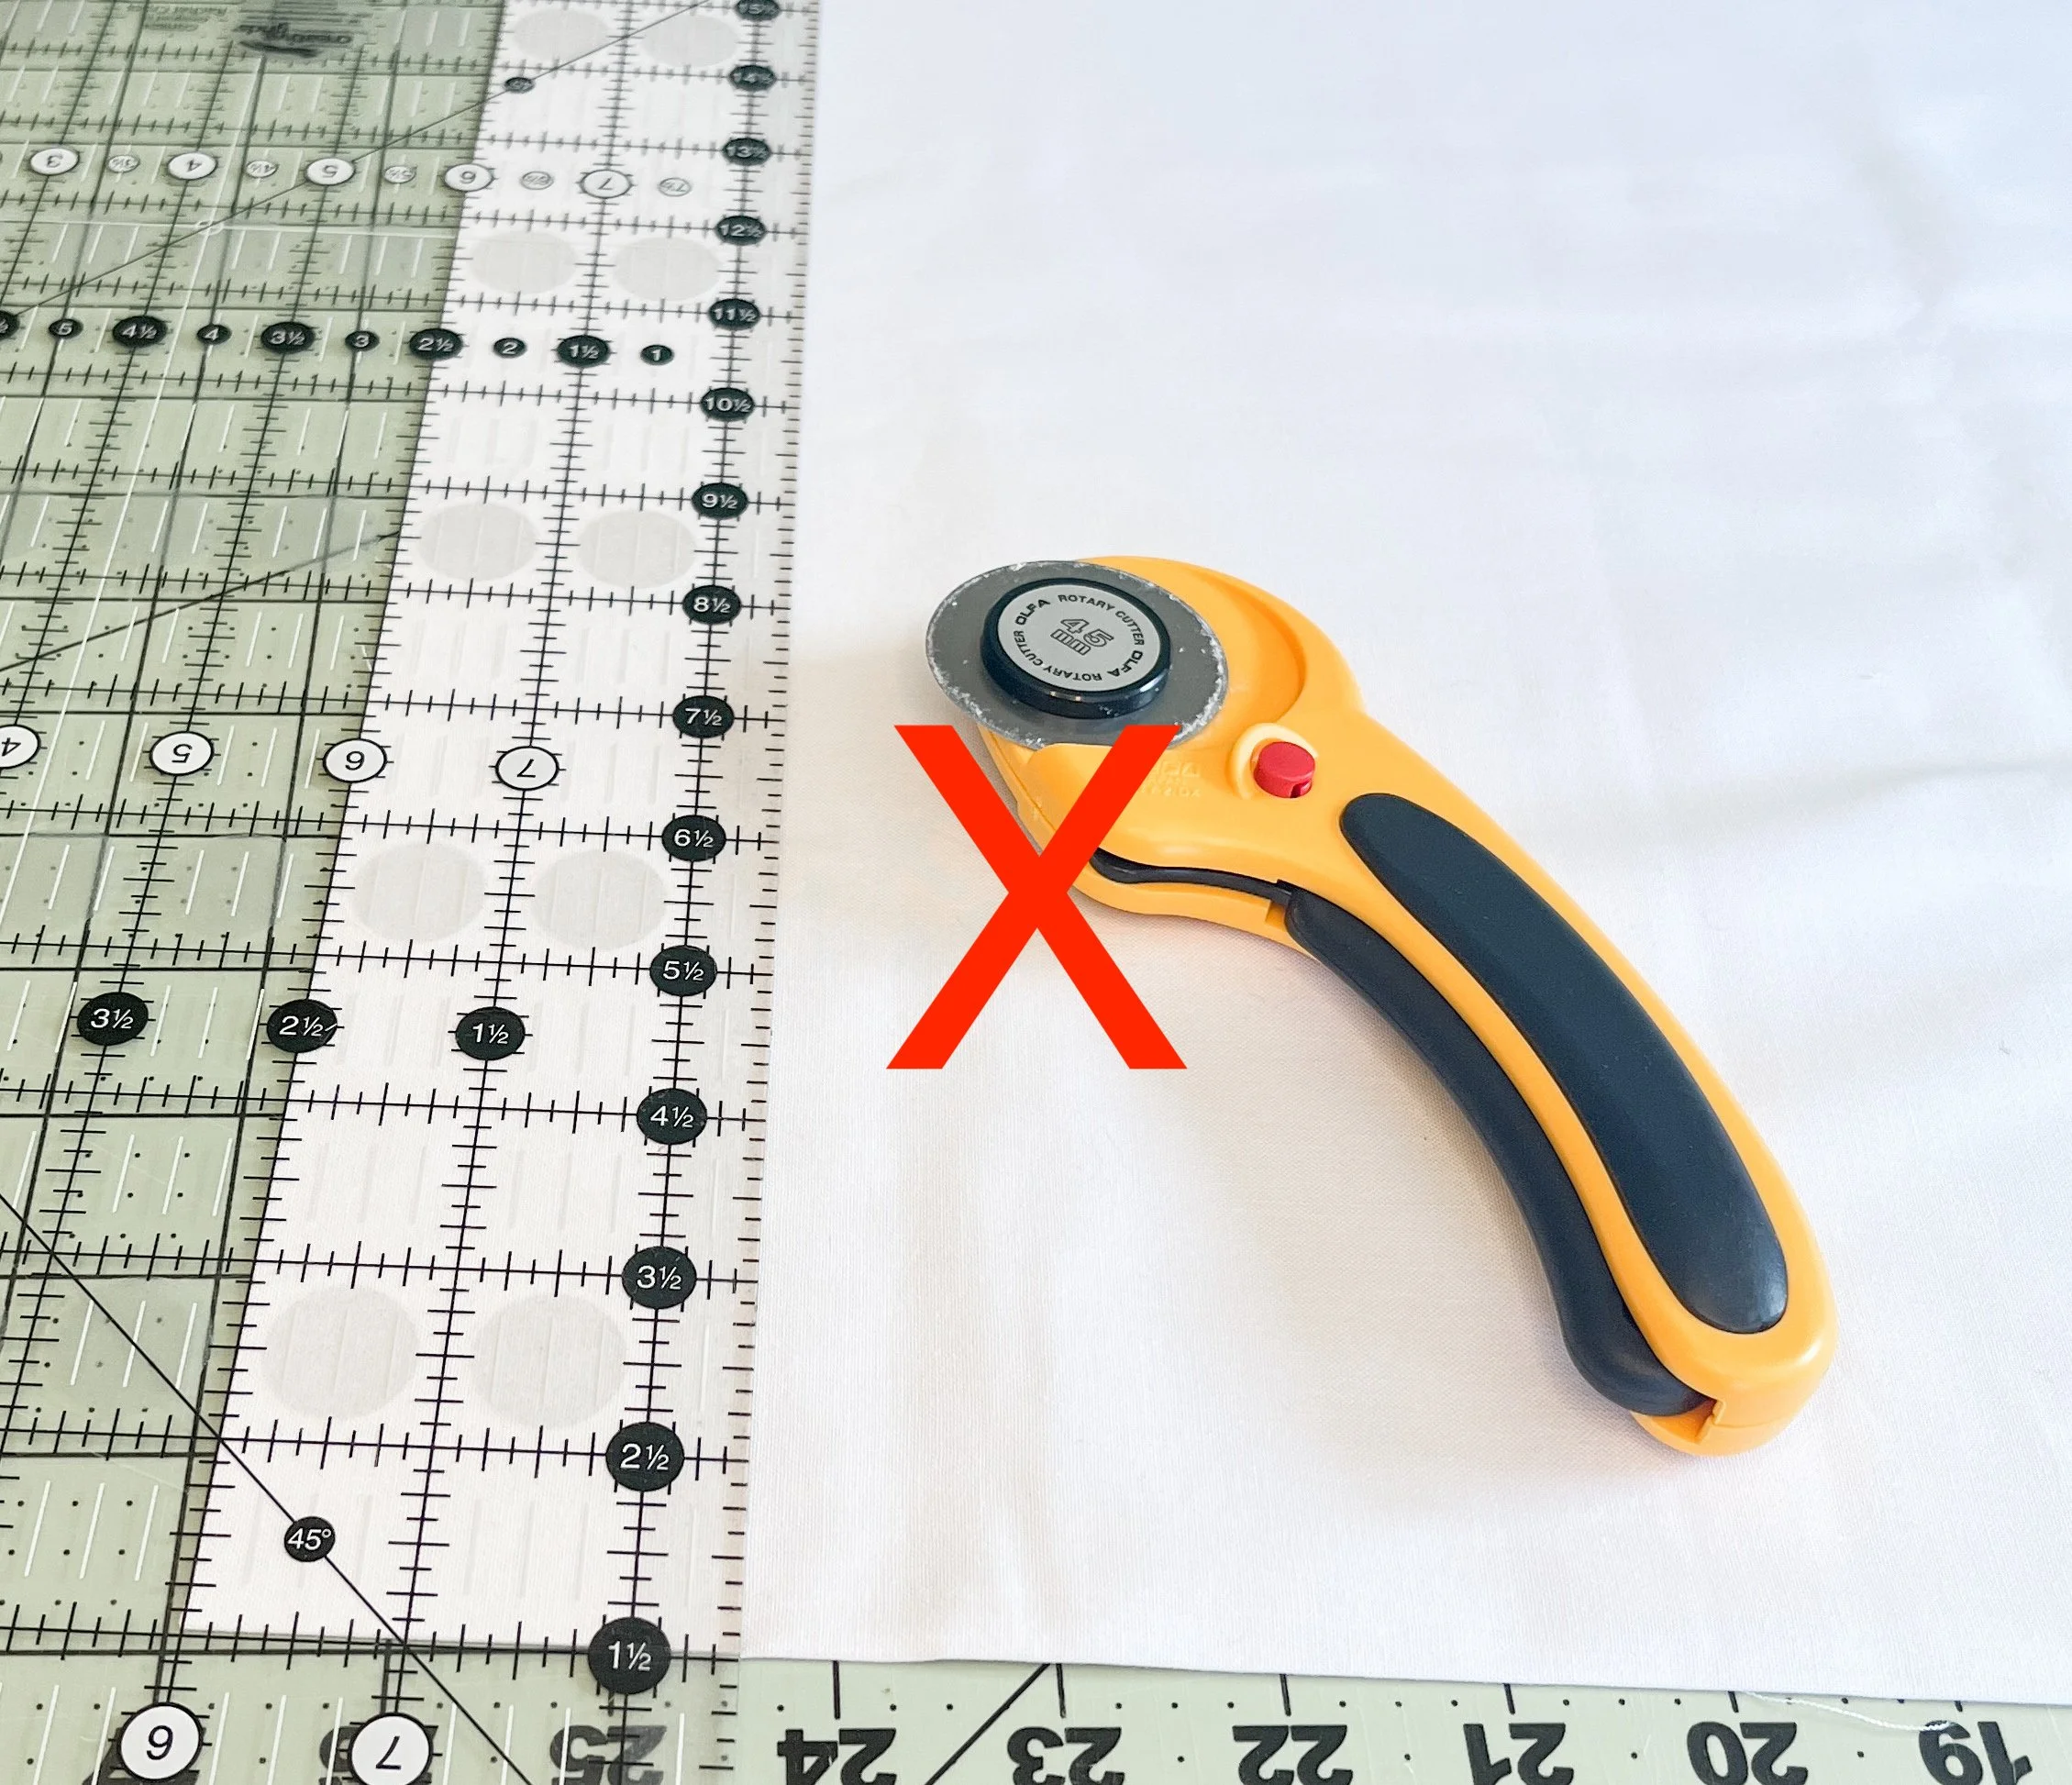
1. ALWAYS close or retract the blade when setting your rotary cutter down. It’s so easy to set your cutter down for “just a second” and then you reach for it and touch the open blade, or a pet or child knocks it down.
Start the habit right away – I’m guilty of this and it makes me so nervous!
2. Make your cuts slowly and intentionally. Don’t try to rush.
3. Check your rulers for knicks and rough spots. If the edge isn’t smooth, your rotary cutter can “jump the curb” and instead of cutting the fabric, it could cut your hand.
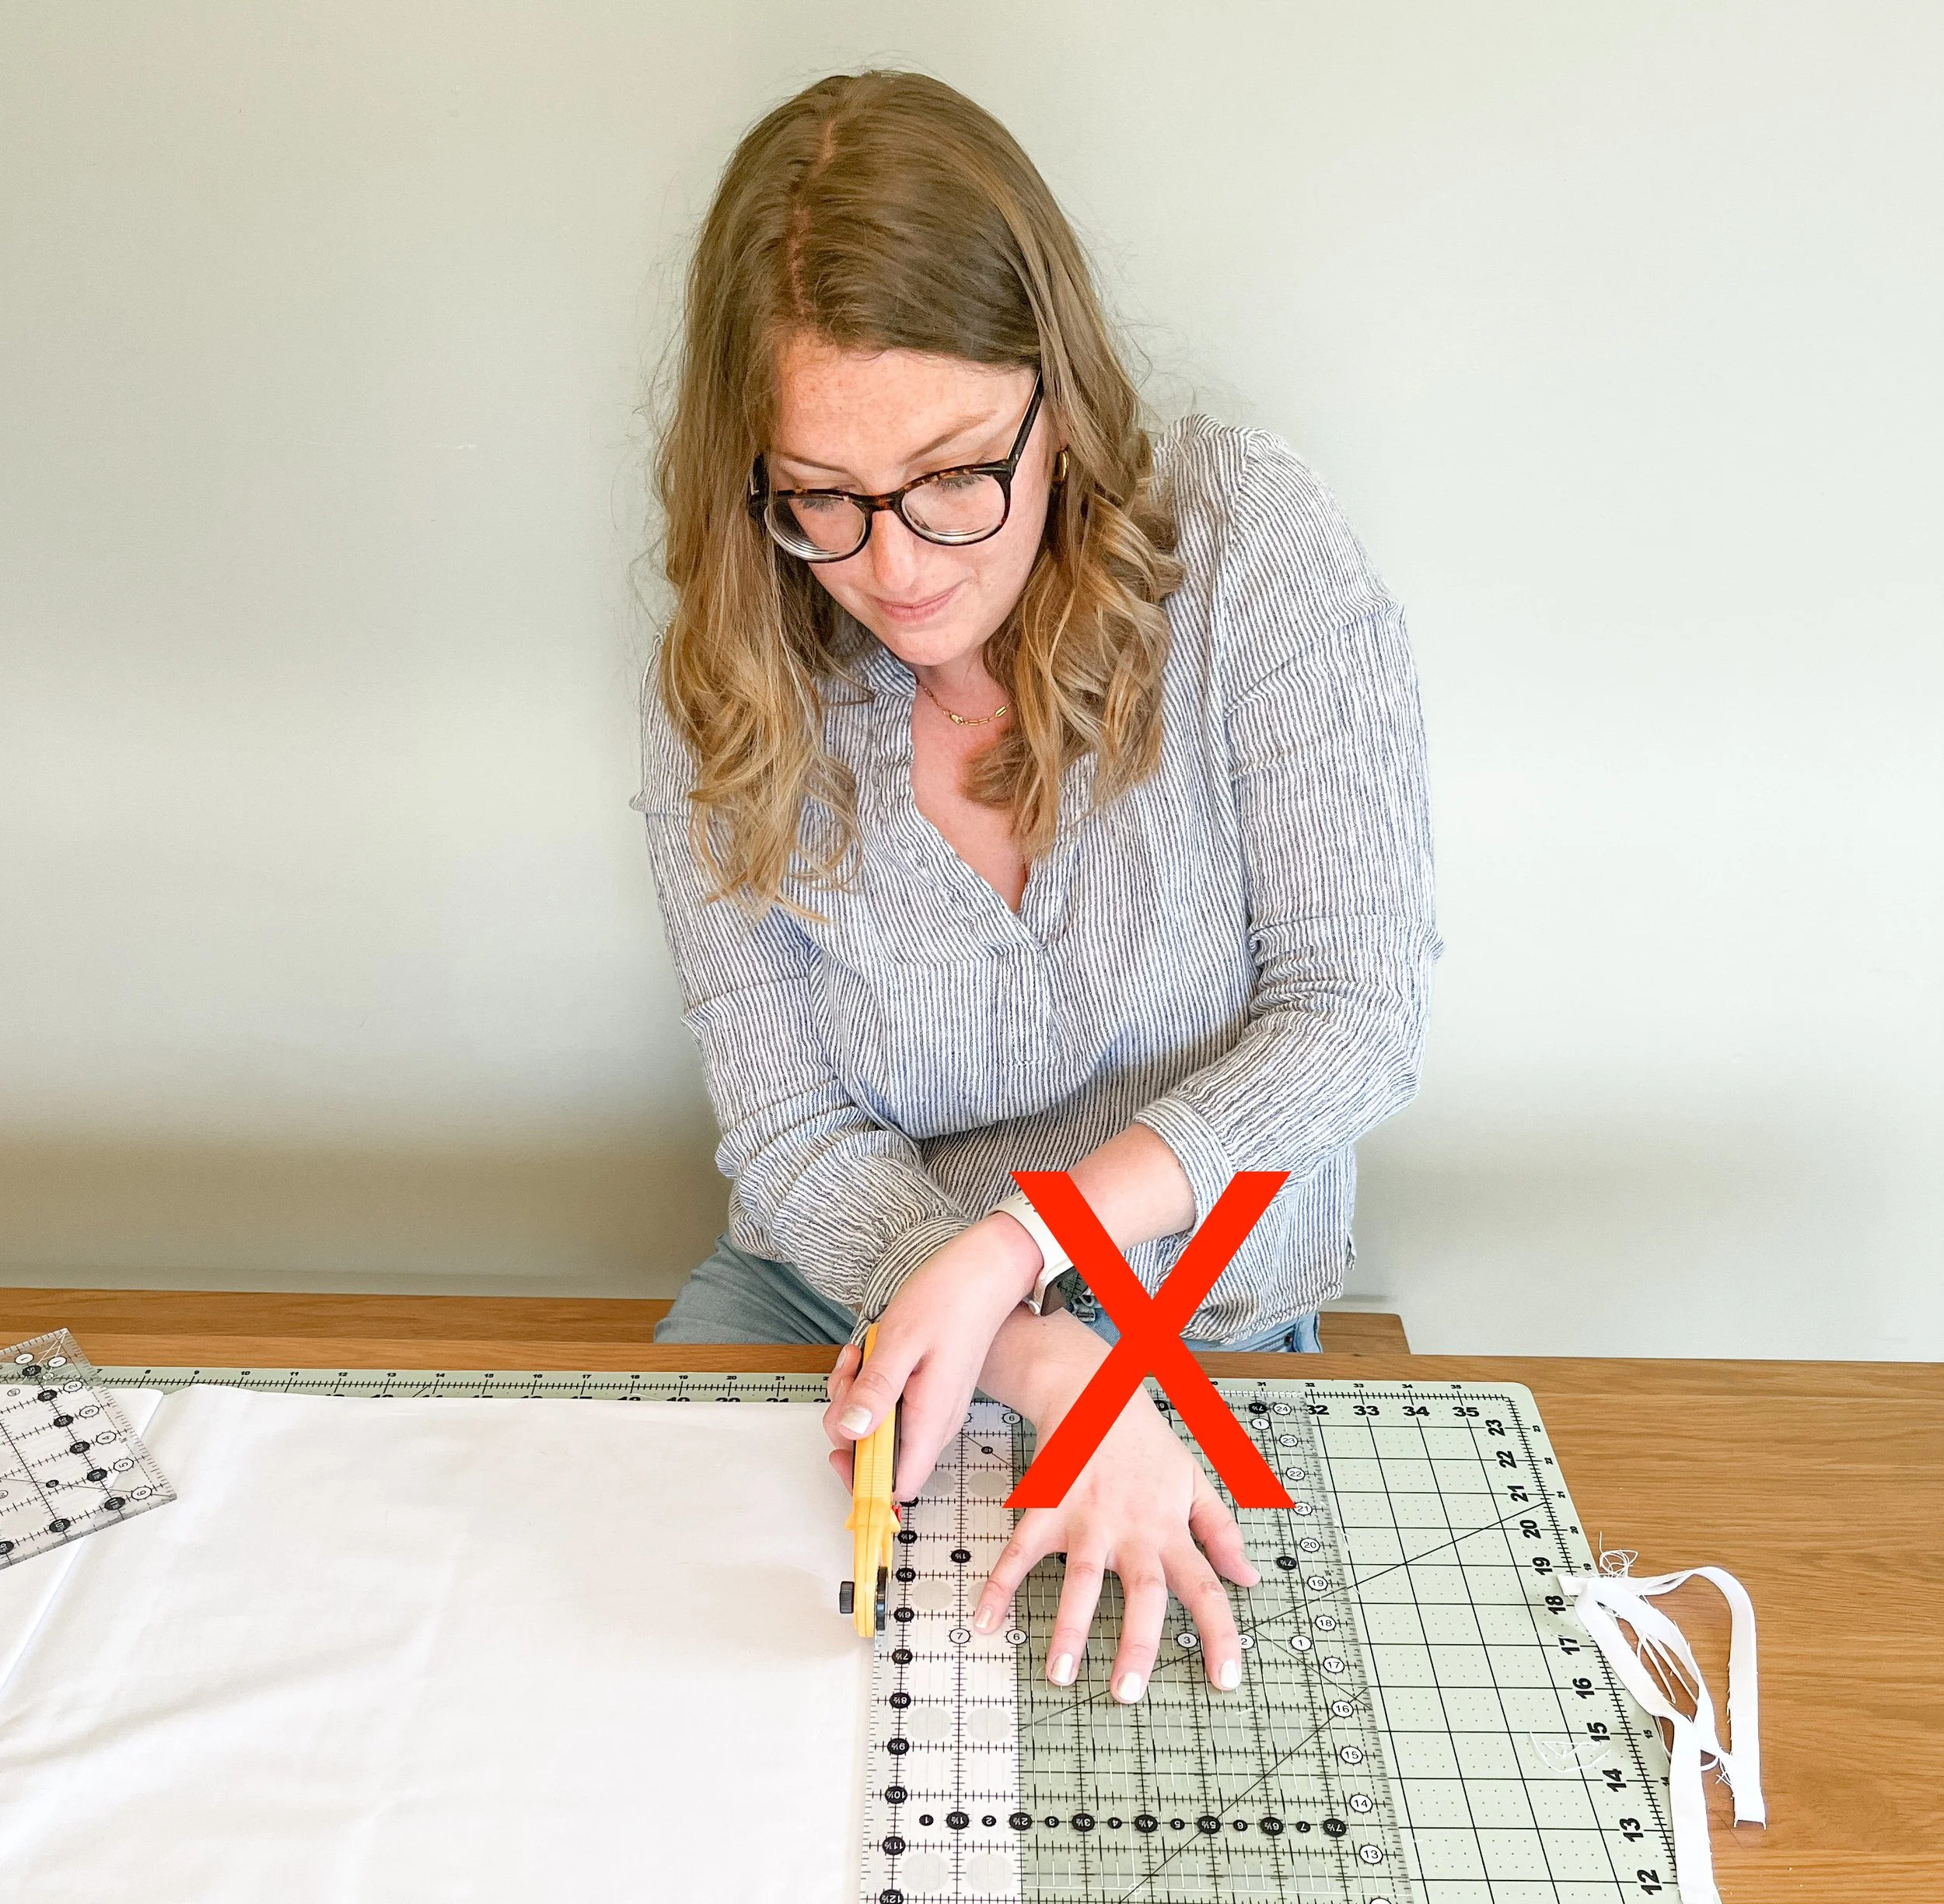
4. NEVER cross your arms while cutting. If you’re a righty, use your left hand to secure the ruler and your right hand to cut. If you have to cross your arms to make the cut, you should either walk around or turn your fabric. You have less control for a straight cut when your arms are crossed. Plus your hand-eye coordination can get confused in your brain.
5. Instead of using your whole hand – palm and fingers – to secure the ruler, try using just your fingertips. If it feels like the ruler is moving, pause and scoot your fingers along to the section you’re trying to cut.
Why are there so many shapes and sizes and does it matter which one I use?
There are a lot of choices out there when it comes to quilting rulers! My favorite brand is Creative Grids. They make non-slip rulers with easy-to-use lines and markers. My two most-used ruler sizes are the 8 ½ x 24 ½ and the 6 ½ x 12 ½. A lot of this is just preference, depending on the pattern and how long or small the pieces are that I’m cutting. The smaller ruler is easier to secure, but the longer ruler is needed for cutting WOF (width of fabric) pieces.
There are also specific rulers you can use for half square triangles (HST) and flying geese among others. These rulers are not required, but make the trimming process easier and help with squaring up your blocks. I have personally used the Bloc Loc rulers and LOVE them! If you get a 6 ½ inch ruler you’ll be able to use it for most patterns you’re working on.
Cutting accurately is important in quilting if you want your final project to line up like it’s supposed to. Take it from a type A accountant! To follow along as I share everything I’ve learned in the last 8 years I’ve been quilting and 20+ years I’ve been sewing, sign up for the newsletter below.
Happy quilting!
Get Your Free Quilt Pattern!
Subscribe to the newsletter to receive your free offer.